

Getting started: build your first app
Build and publish your first Keboola app in about 10 minutes — describe it to Kai, watch it read your data and build a dashboard, then deploy it to a live URL. No code required.
Keboola apps are interactive web applications — dashboards, tools, even data narratives — that run inside your project, on top of your governed data. The app can only reach data you already have access to, there’s no separate hosting to set up, and you can build it just by describing what you want.
This walkthrough takes you from nothing to a live, deployed dashboard in about 10 minutes, using Kai. You won’t write any code.
Apps go well beyond dashboards — you describe what you want and Kai builds it, whether that’s a dashboard, an internal tool, or a scrollable data narrative. For the range of what’s possible, see Beyond dashboards. This page builds a simple dashboard so you can learn the flow; the same steps produce any of them.
What you’ll need
Section titled “What you’ll need”- A Keboola project with Kai available.
- At least one table in Storage — Kai reads your data directly, so it works with whatever you already have.
- A few minutes.
Step 1 — Open Apps and start a new app
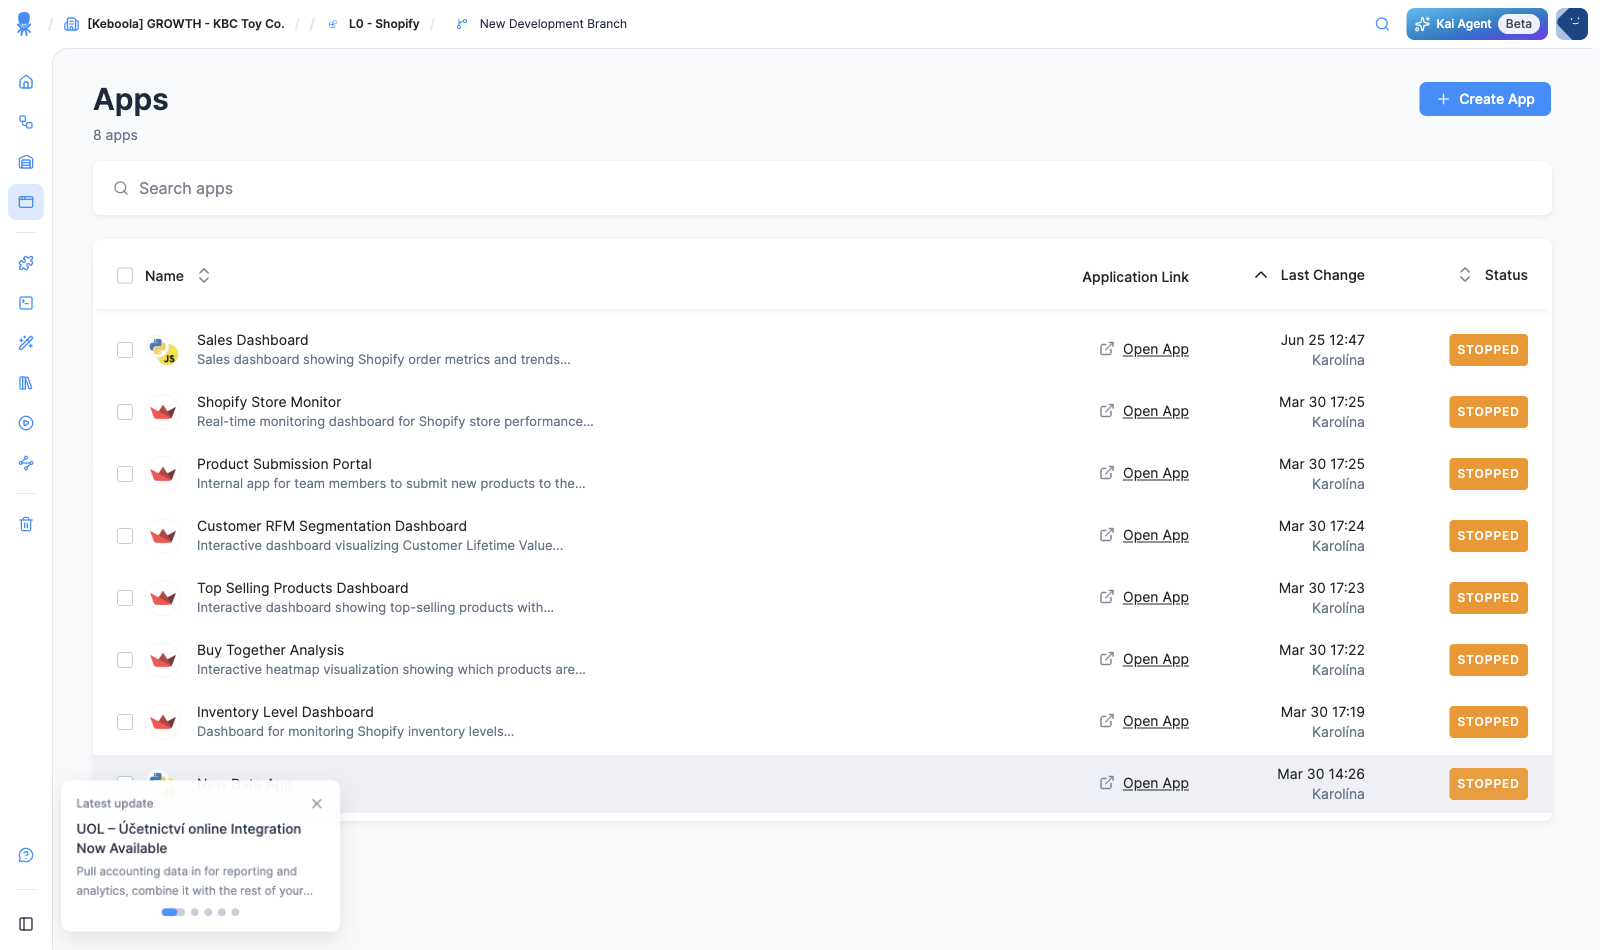
Section titled “Step 1 — Open Apps and start a new app”In your project, open Apps from the left navigation, then click + Create App.
You land on the Build web apps from your Keboola data screen. It leads with a single prompt — “Describe what you want to build…” — and, below it, manual Streamlit and Python / JS options for when you’d rather set things up yourself.
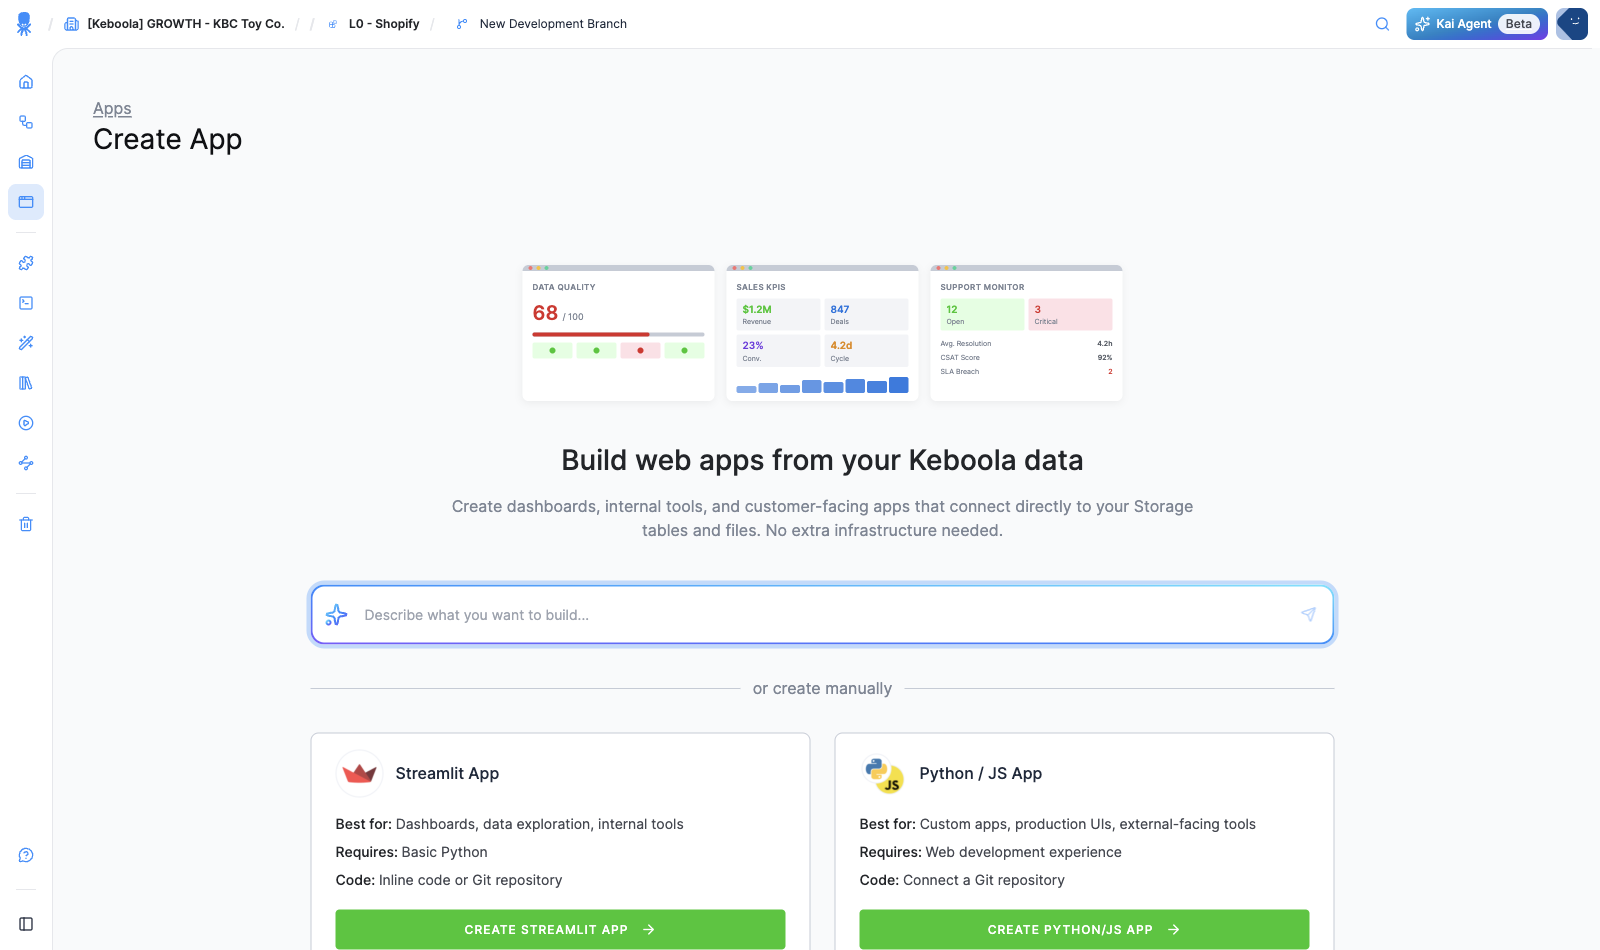
Step 2 — Describe the app you want
Section titled “Step 2 — Describe the app you want”Type what you want in plain language. Name the kind of app, what it should show, and keep it simple for your first one. For example:
Build a simple dashboard from my Storage data: a title, three key metrics as big number tiles, and one bar chart. Keep it clean and easy to read.
The more specific you are — the data, the charts, the audience — the closer Kai’s first version will be.
Step 3 — Watch Kai read your data, verify it, and ask for your approval
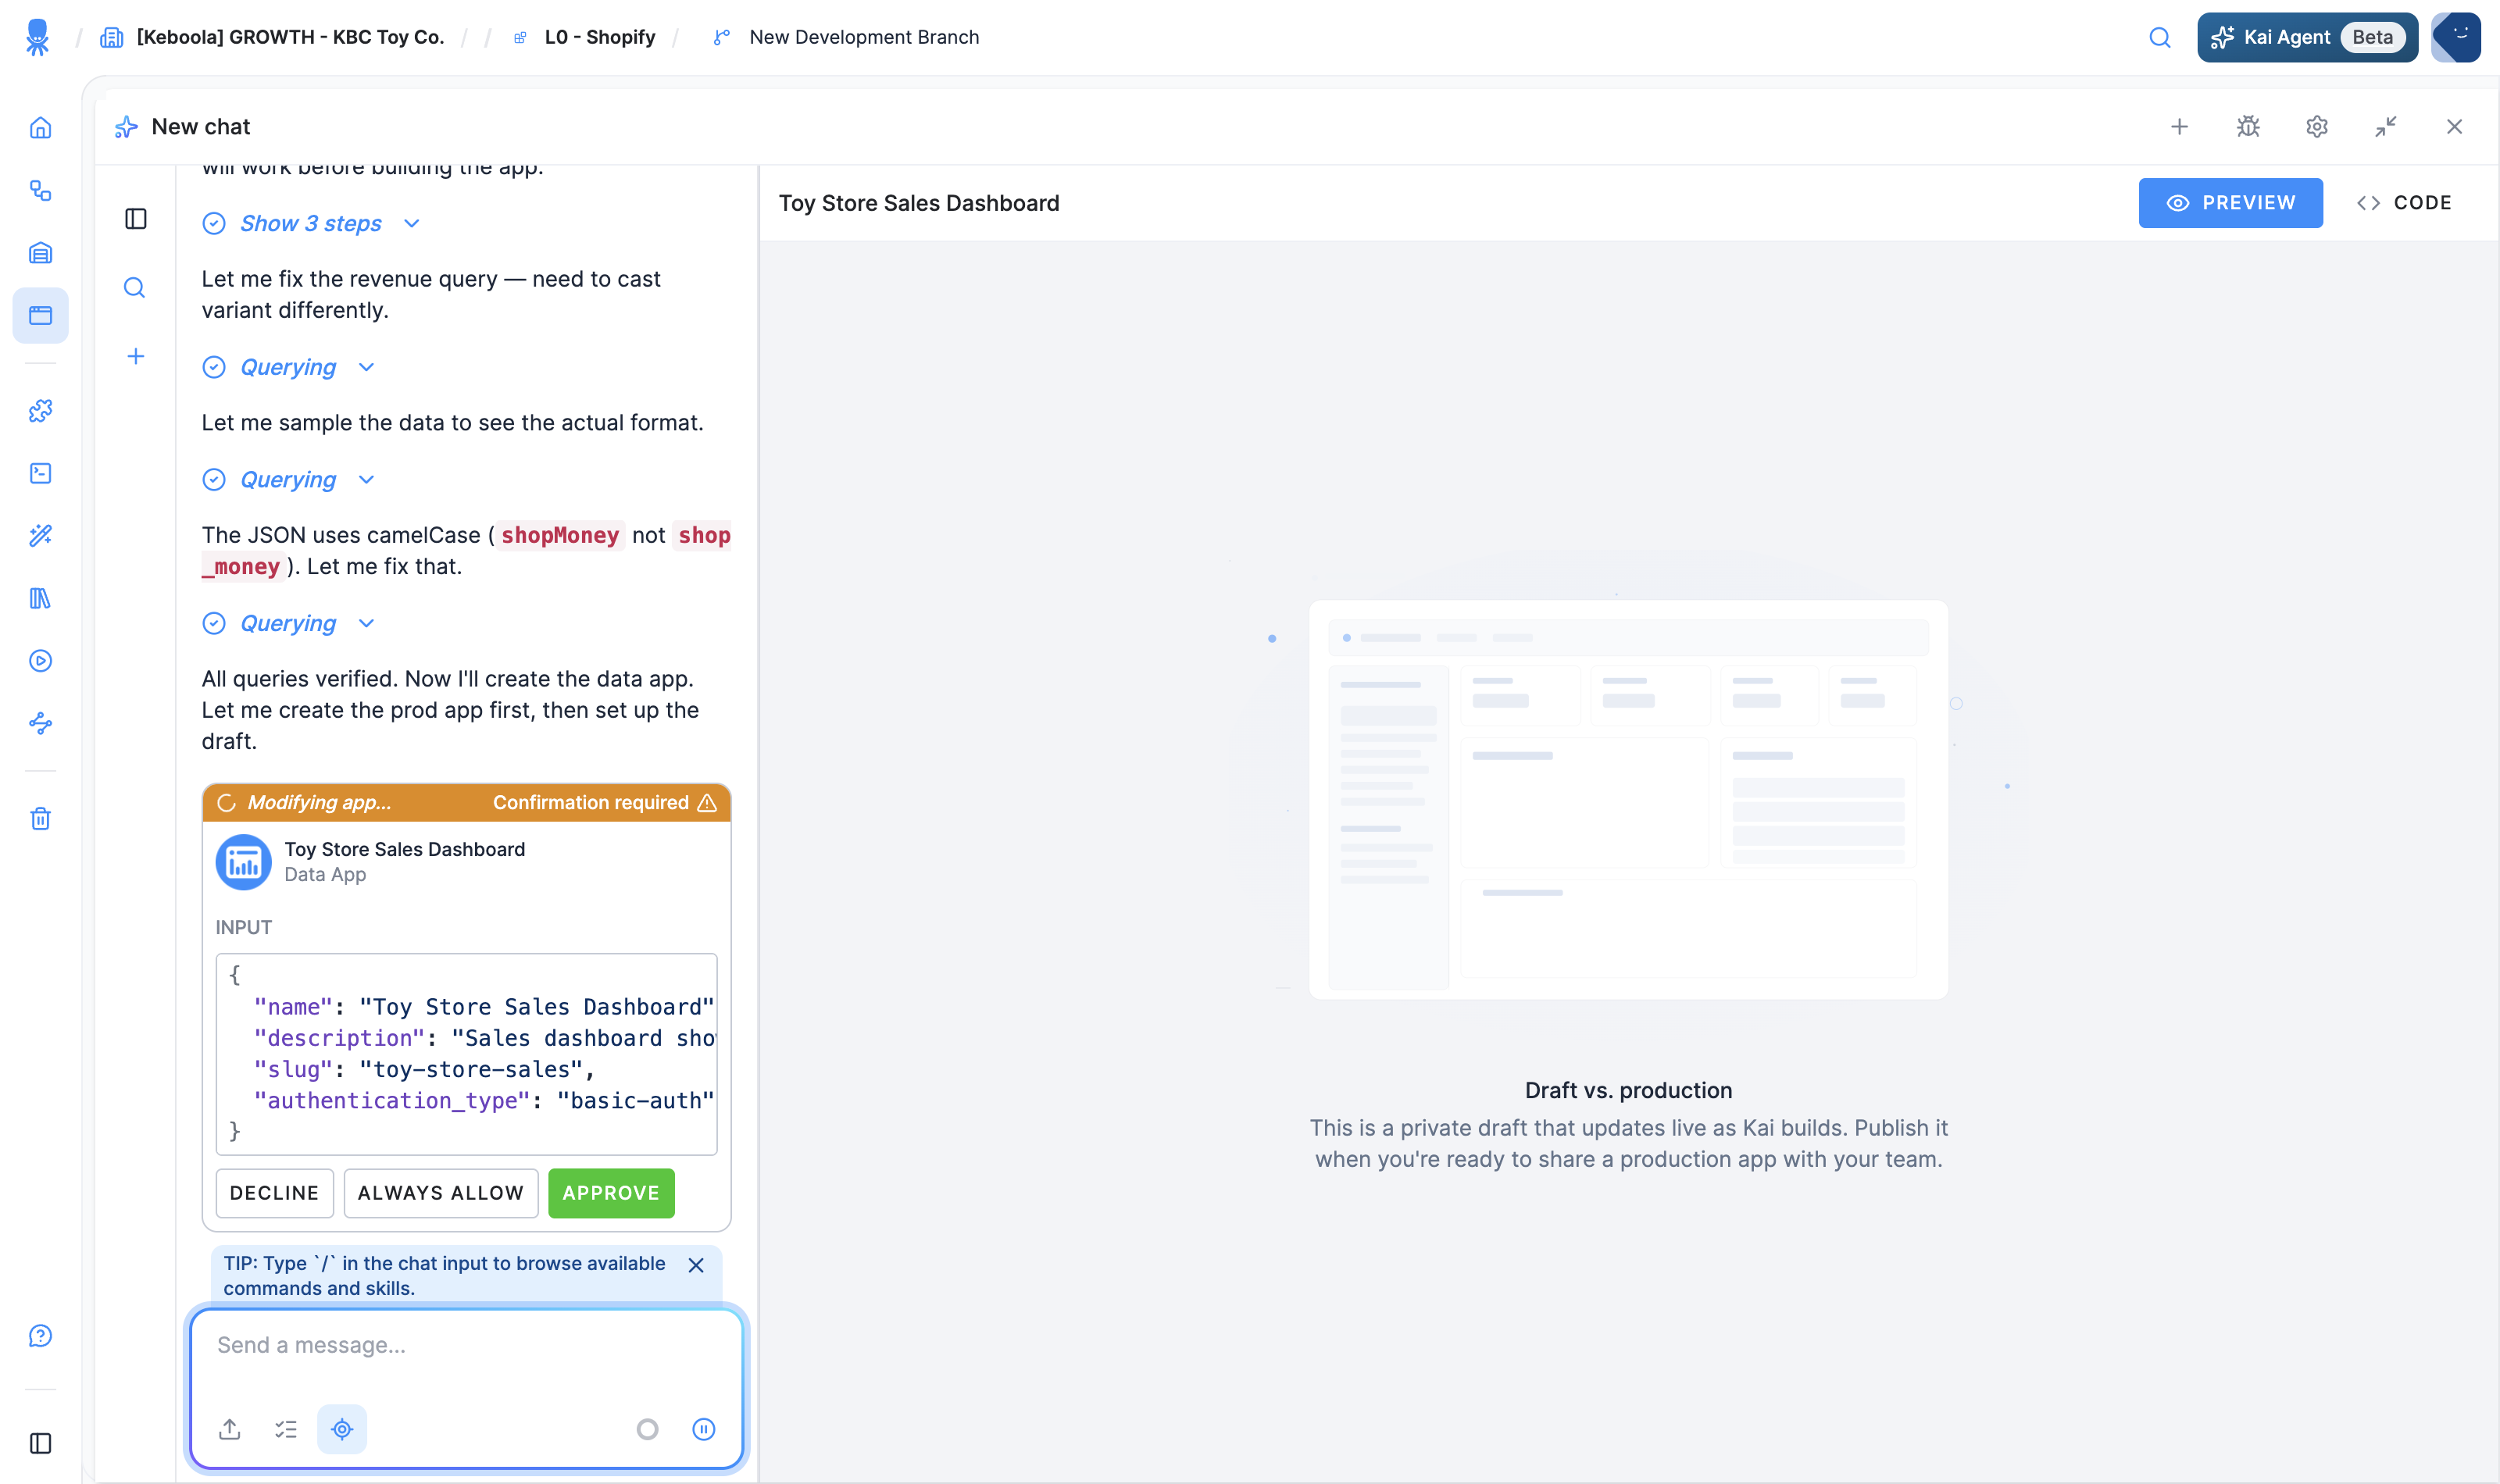
Section titled “Step 3 — Watch Kai read your data, verify it, and ask for your approval”Kai gets to work. It explores your Storage on its own — listing buckets, reading table details, even sampling the data to verify its queries will work. Then, before creating anything in your project, it shows a Confirmation required card with the exact app configuration — name, description, and authentication type — and waits for your Approve (or Decline; Always allow skips this prompt for future builds).
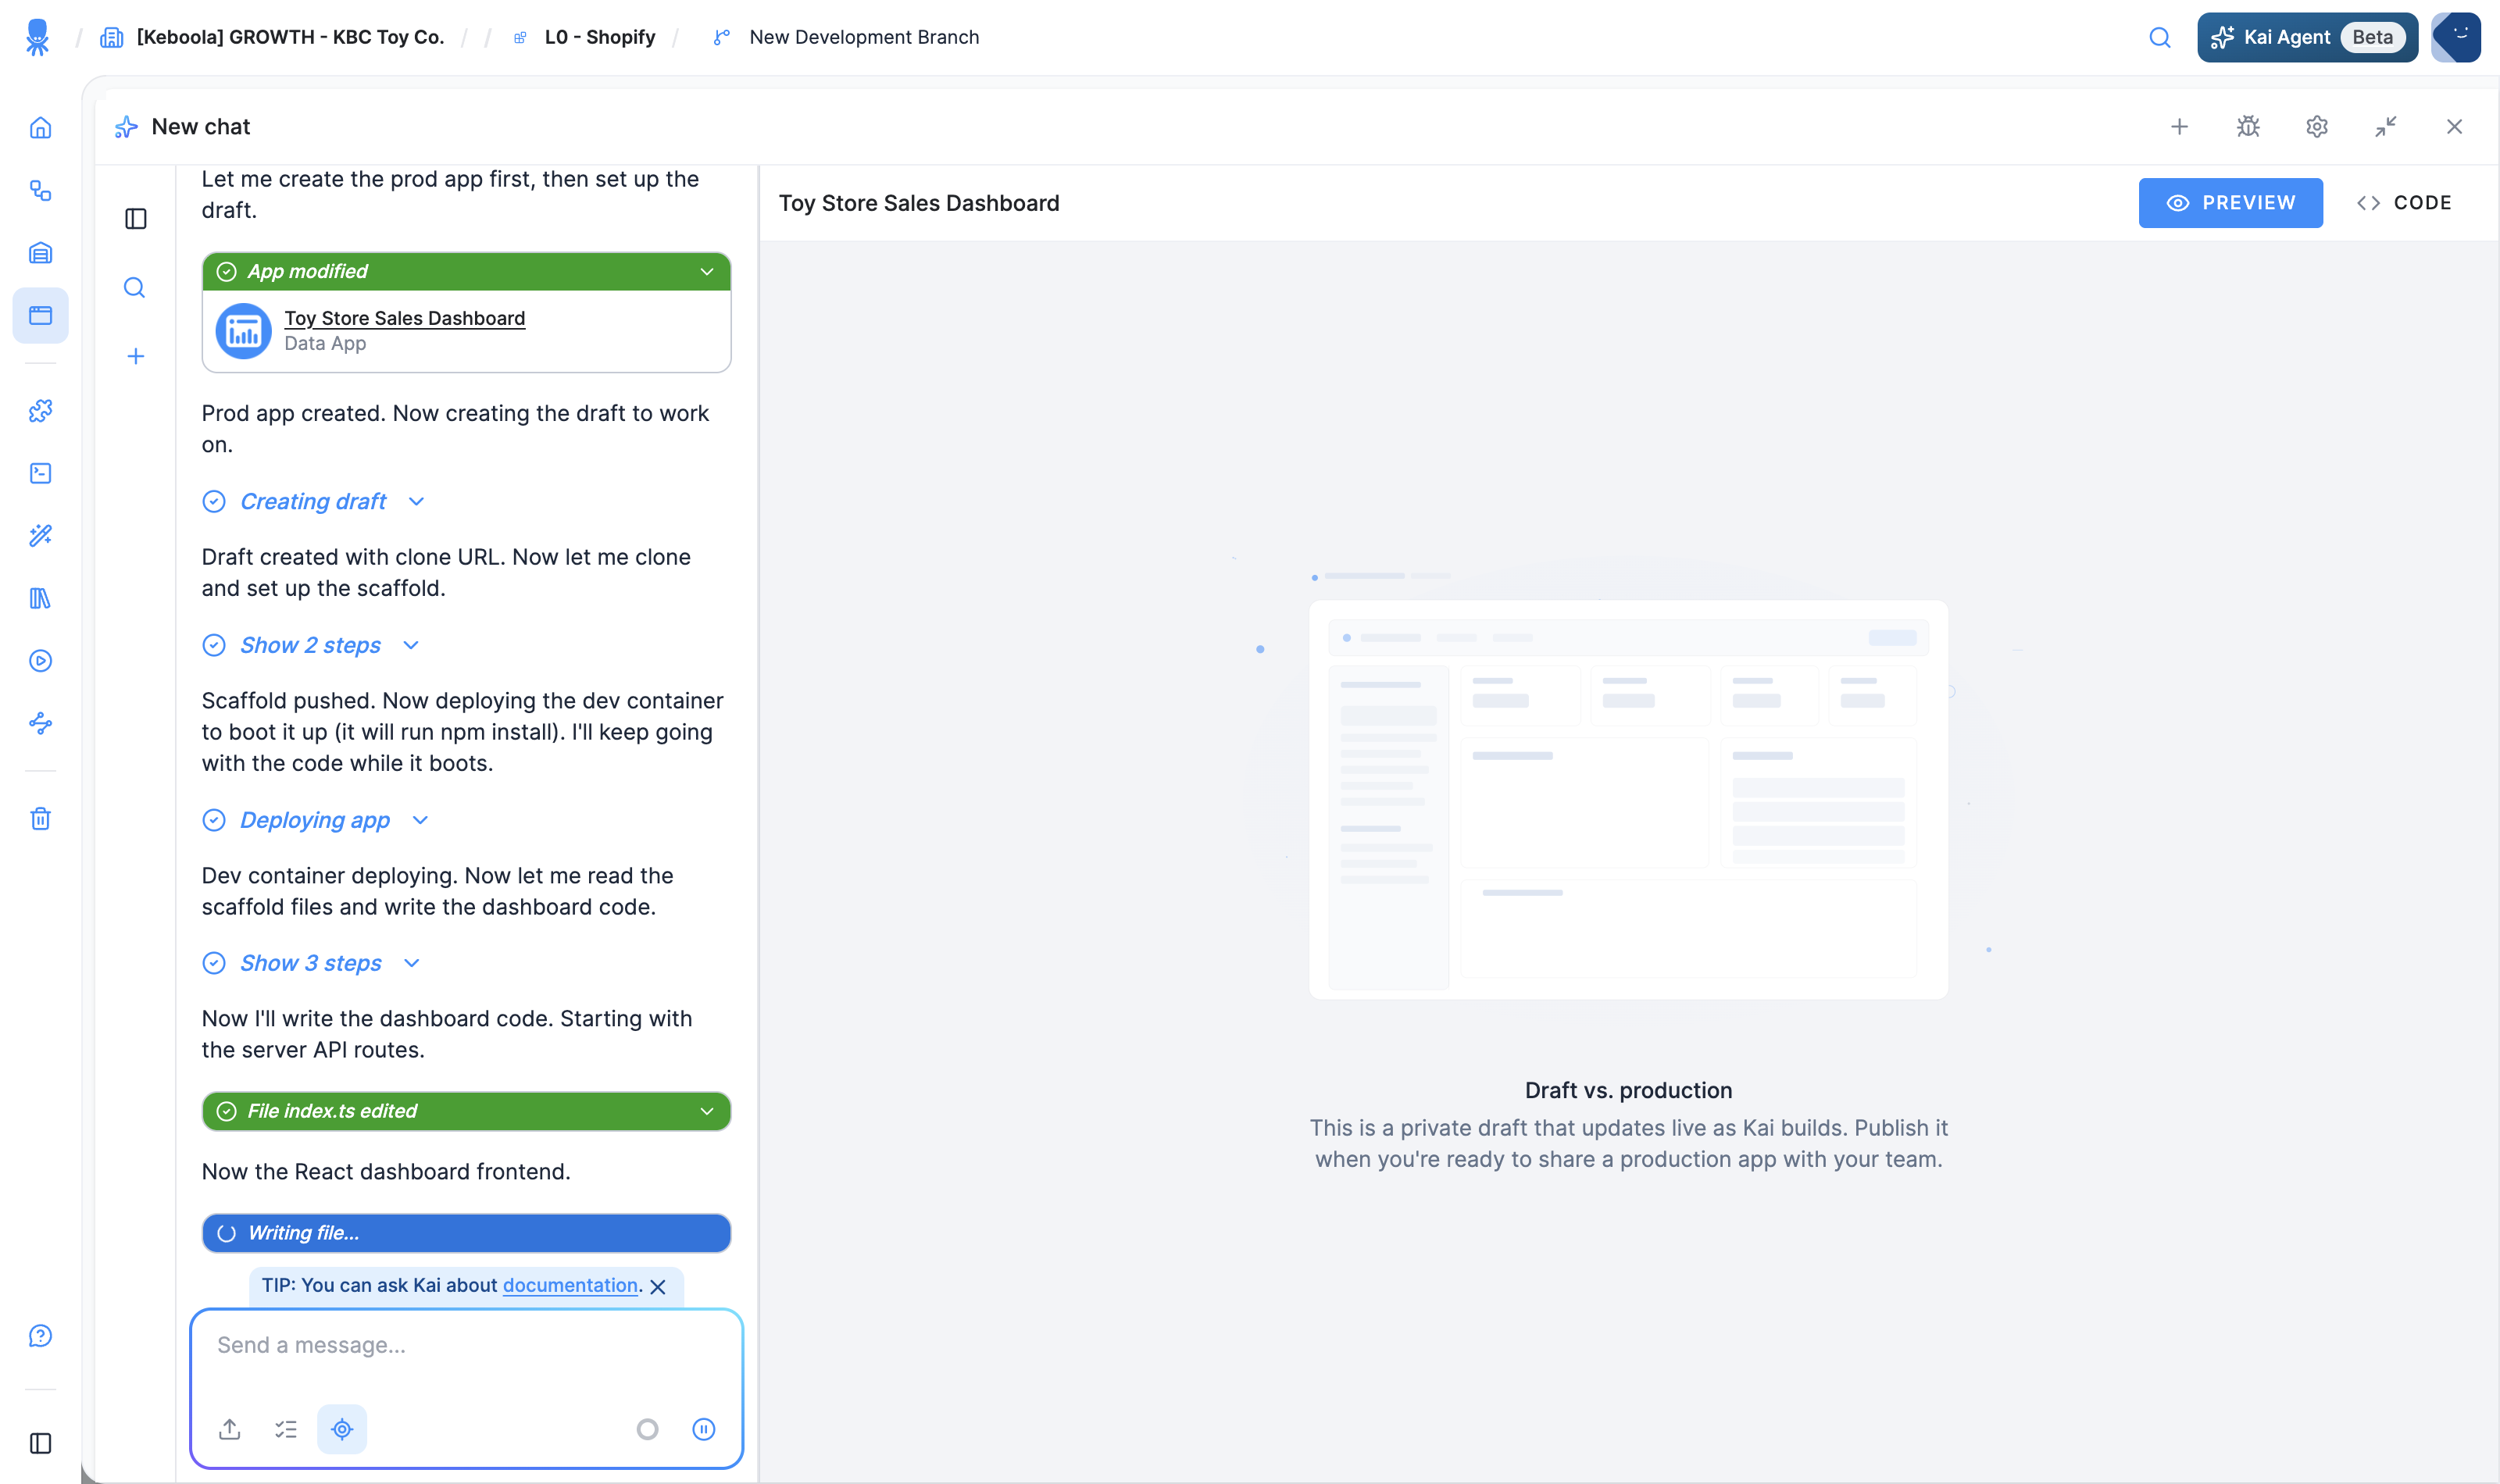
After you approve, Kai creates the app, sets up a private draft, and writes the code — you see each step in the chat (File index.ts edited, Writing file…) while it deploys a development container.
In our run, Kai found the project’s Shopify tables and built a Toy Store Sales Dashboard: total orders, revenue, and customers as tiles, plus a “top products by orders” bar chart.
Step 4 — Preview the draft
Section titled “Step 4 — Preview the draft”The build runs in a split-screen builder: your chat with Kai on the left, and the app as a draft on the right — toggle between a live Preview and the Code view of its files. As the product puts it, this is “a private draft that updates live as Kai builds” — it hot-reloads as Kai edits and doesn’t touch anything you’ve shared. Ask for changes in the chat until it looks right.
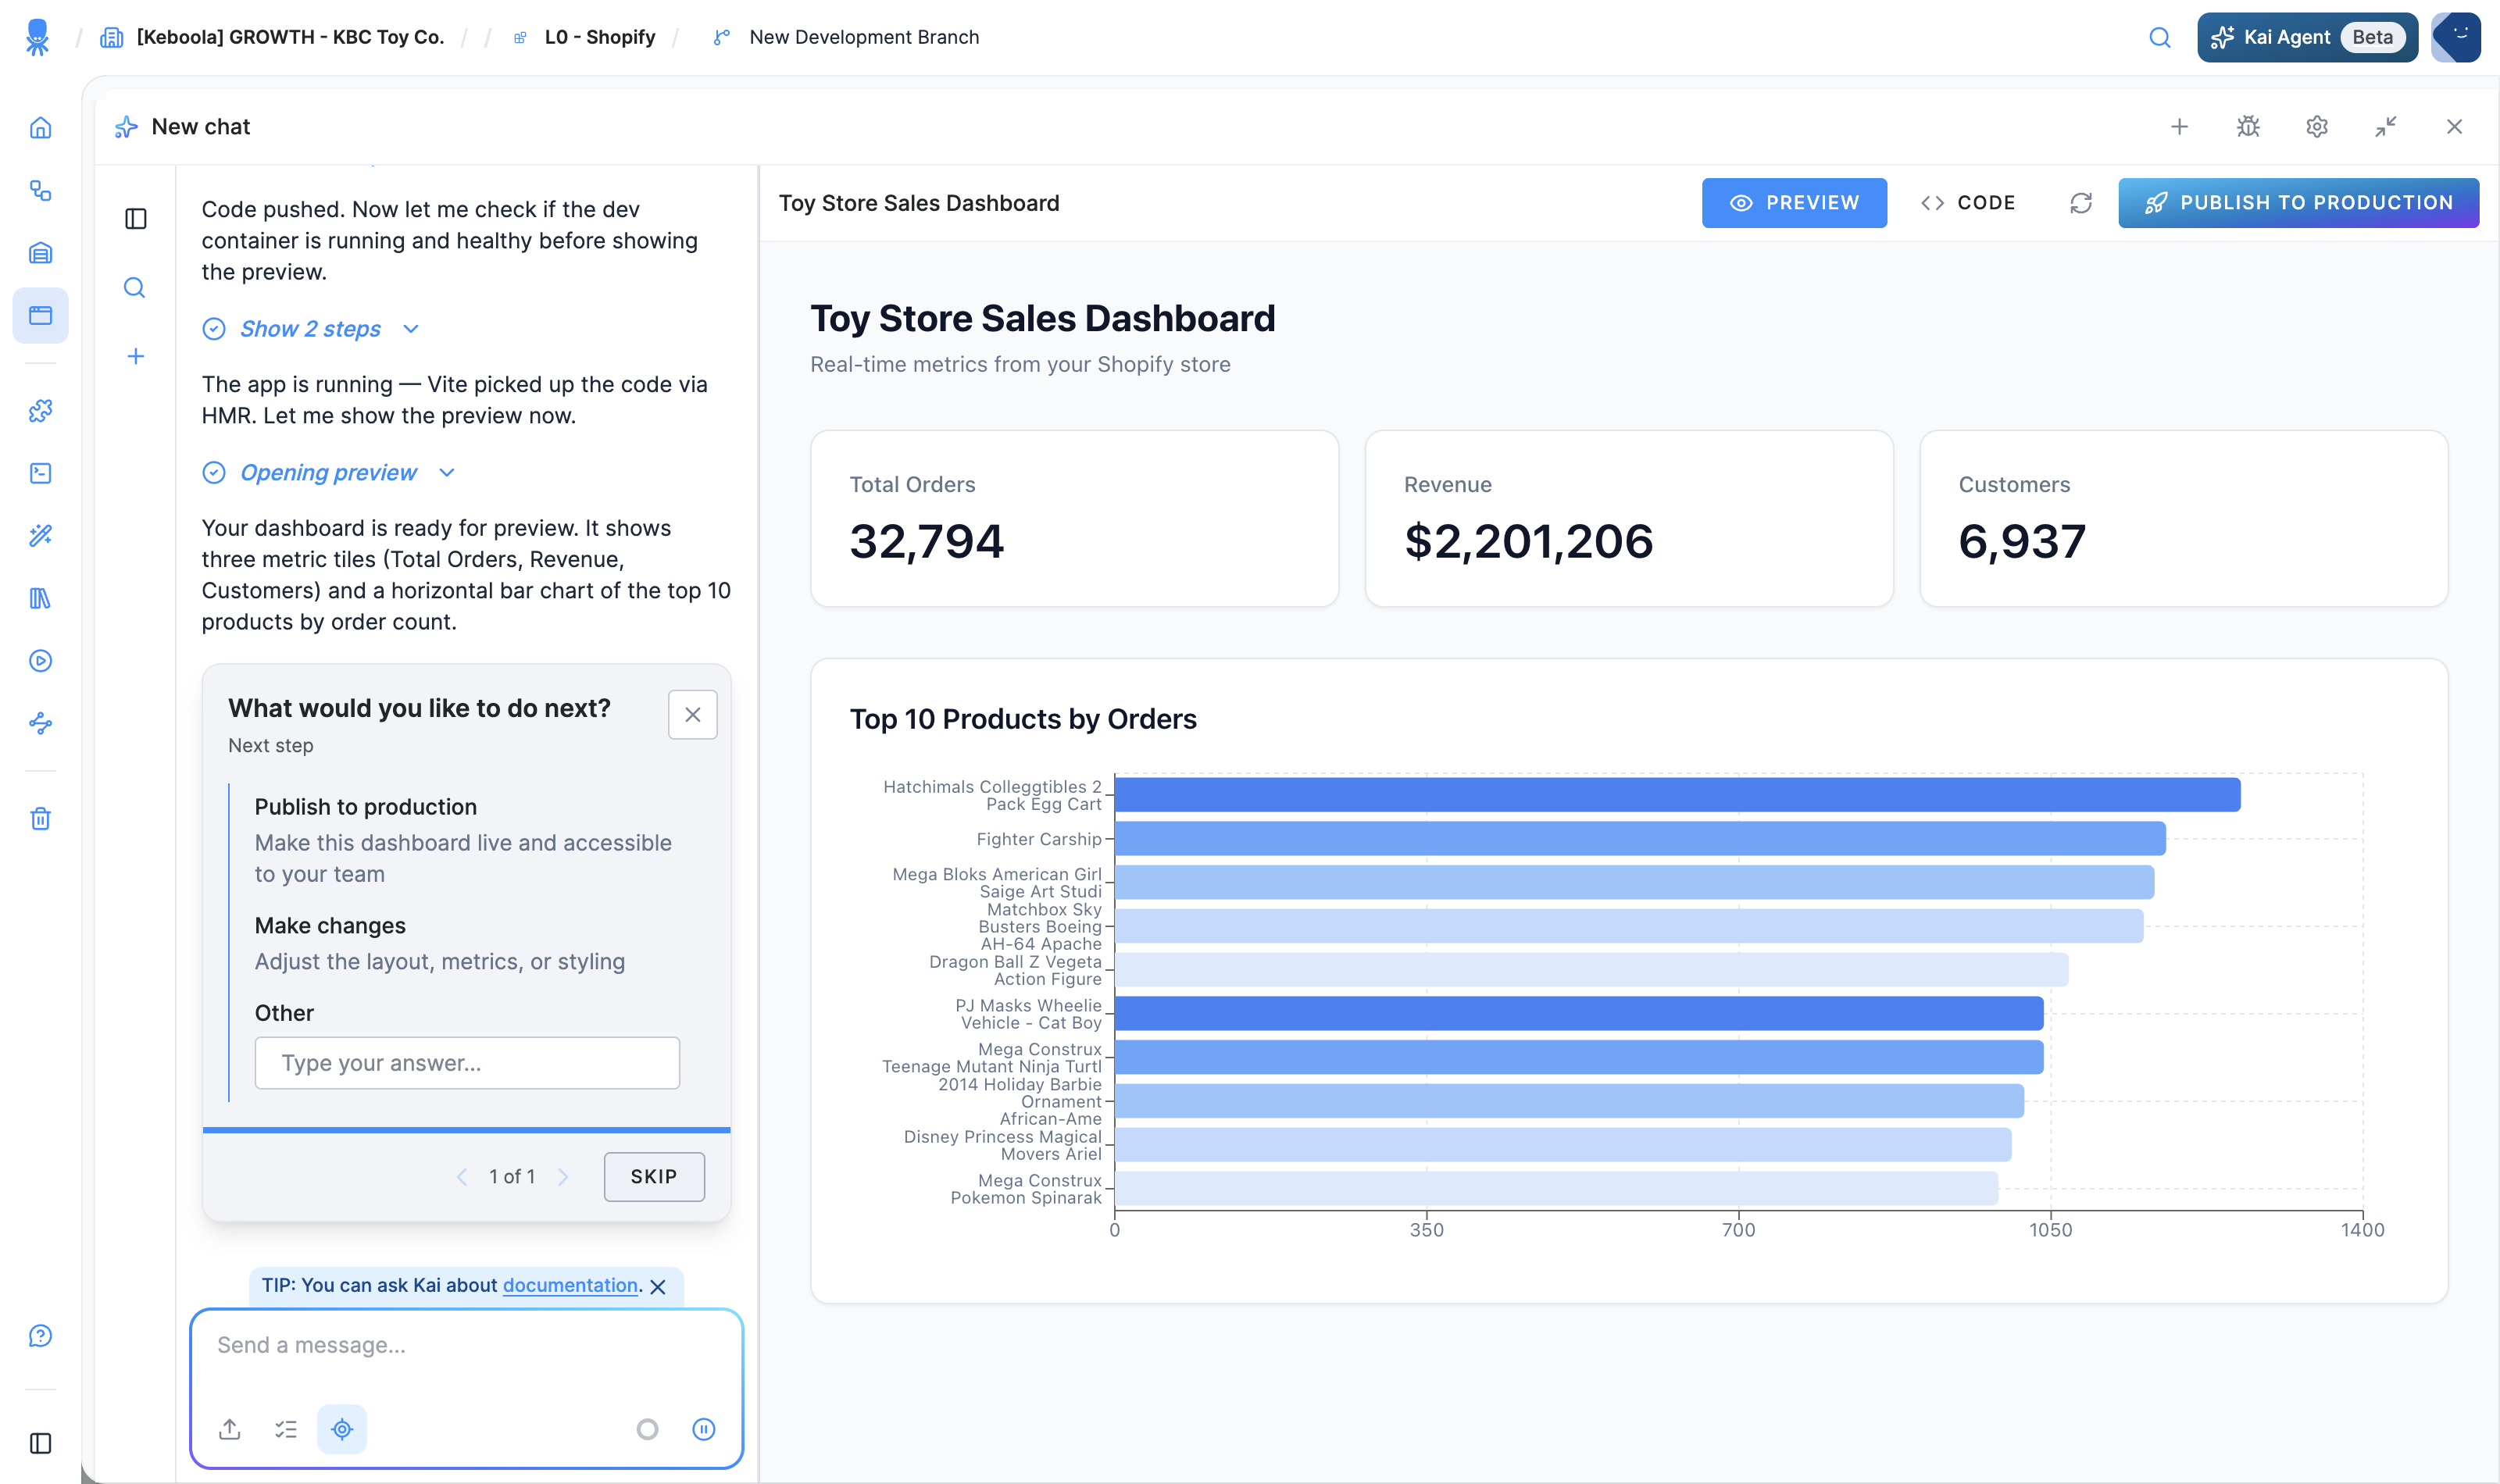
Kai finishes with next-step suggestions: Publish to production, Make changes, or type your own.
Step 5 — Publish to production
Section titled “Step 5 — Publish to production”When you’re happy with the draft, click Publish to Production. Kai merges the draft into the app’s main branch, deploys the production app, and cleans the draft up. The app turns Active and is available at its own URL — and Kai’s final message hands you the App URL, the password, and an Open App button.
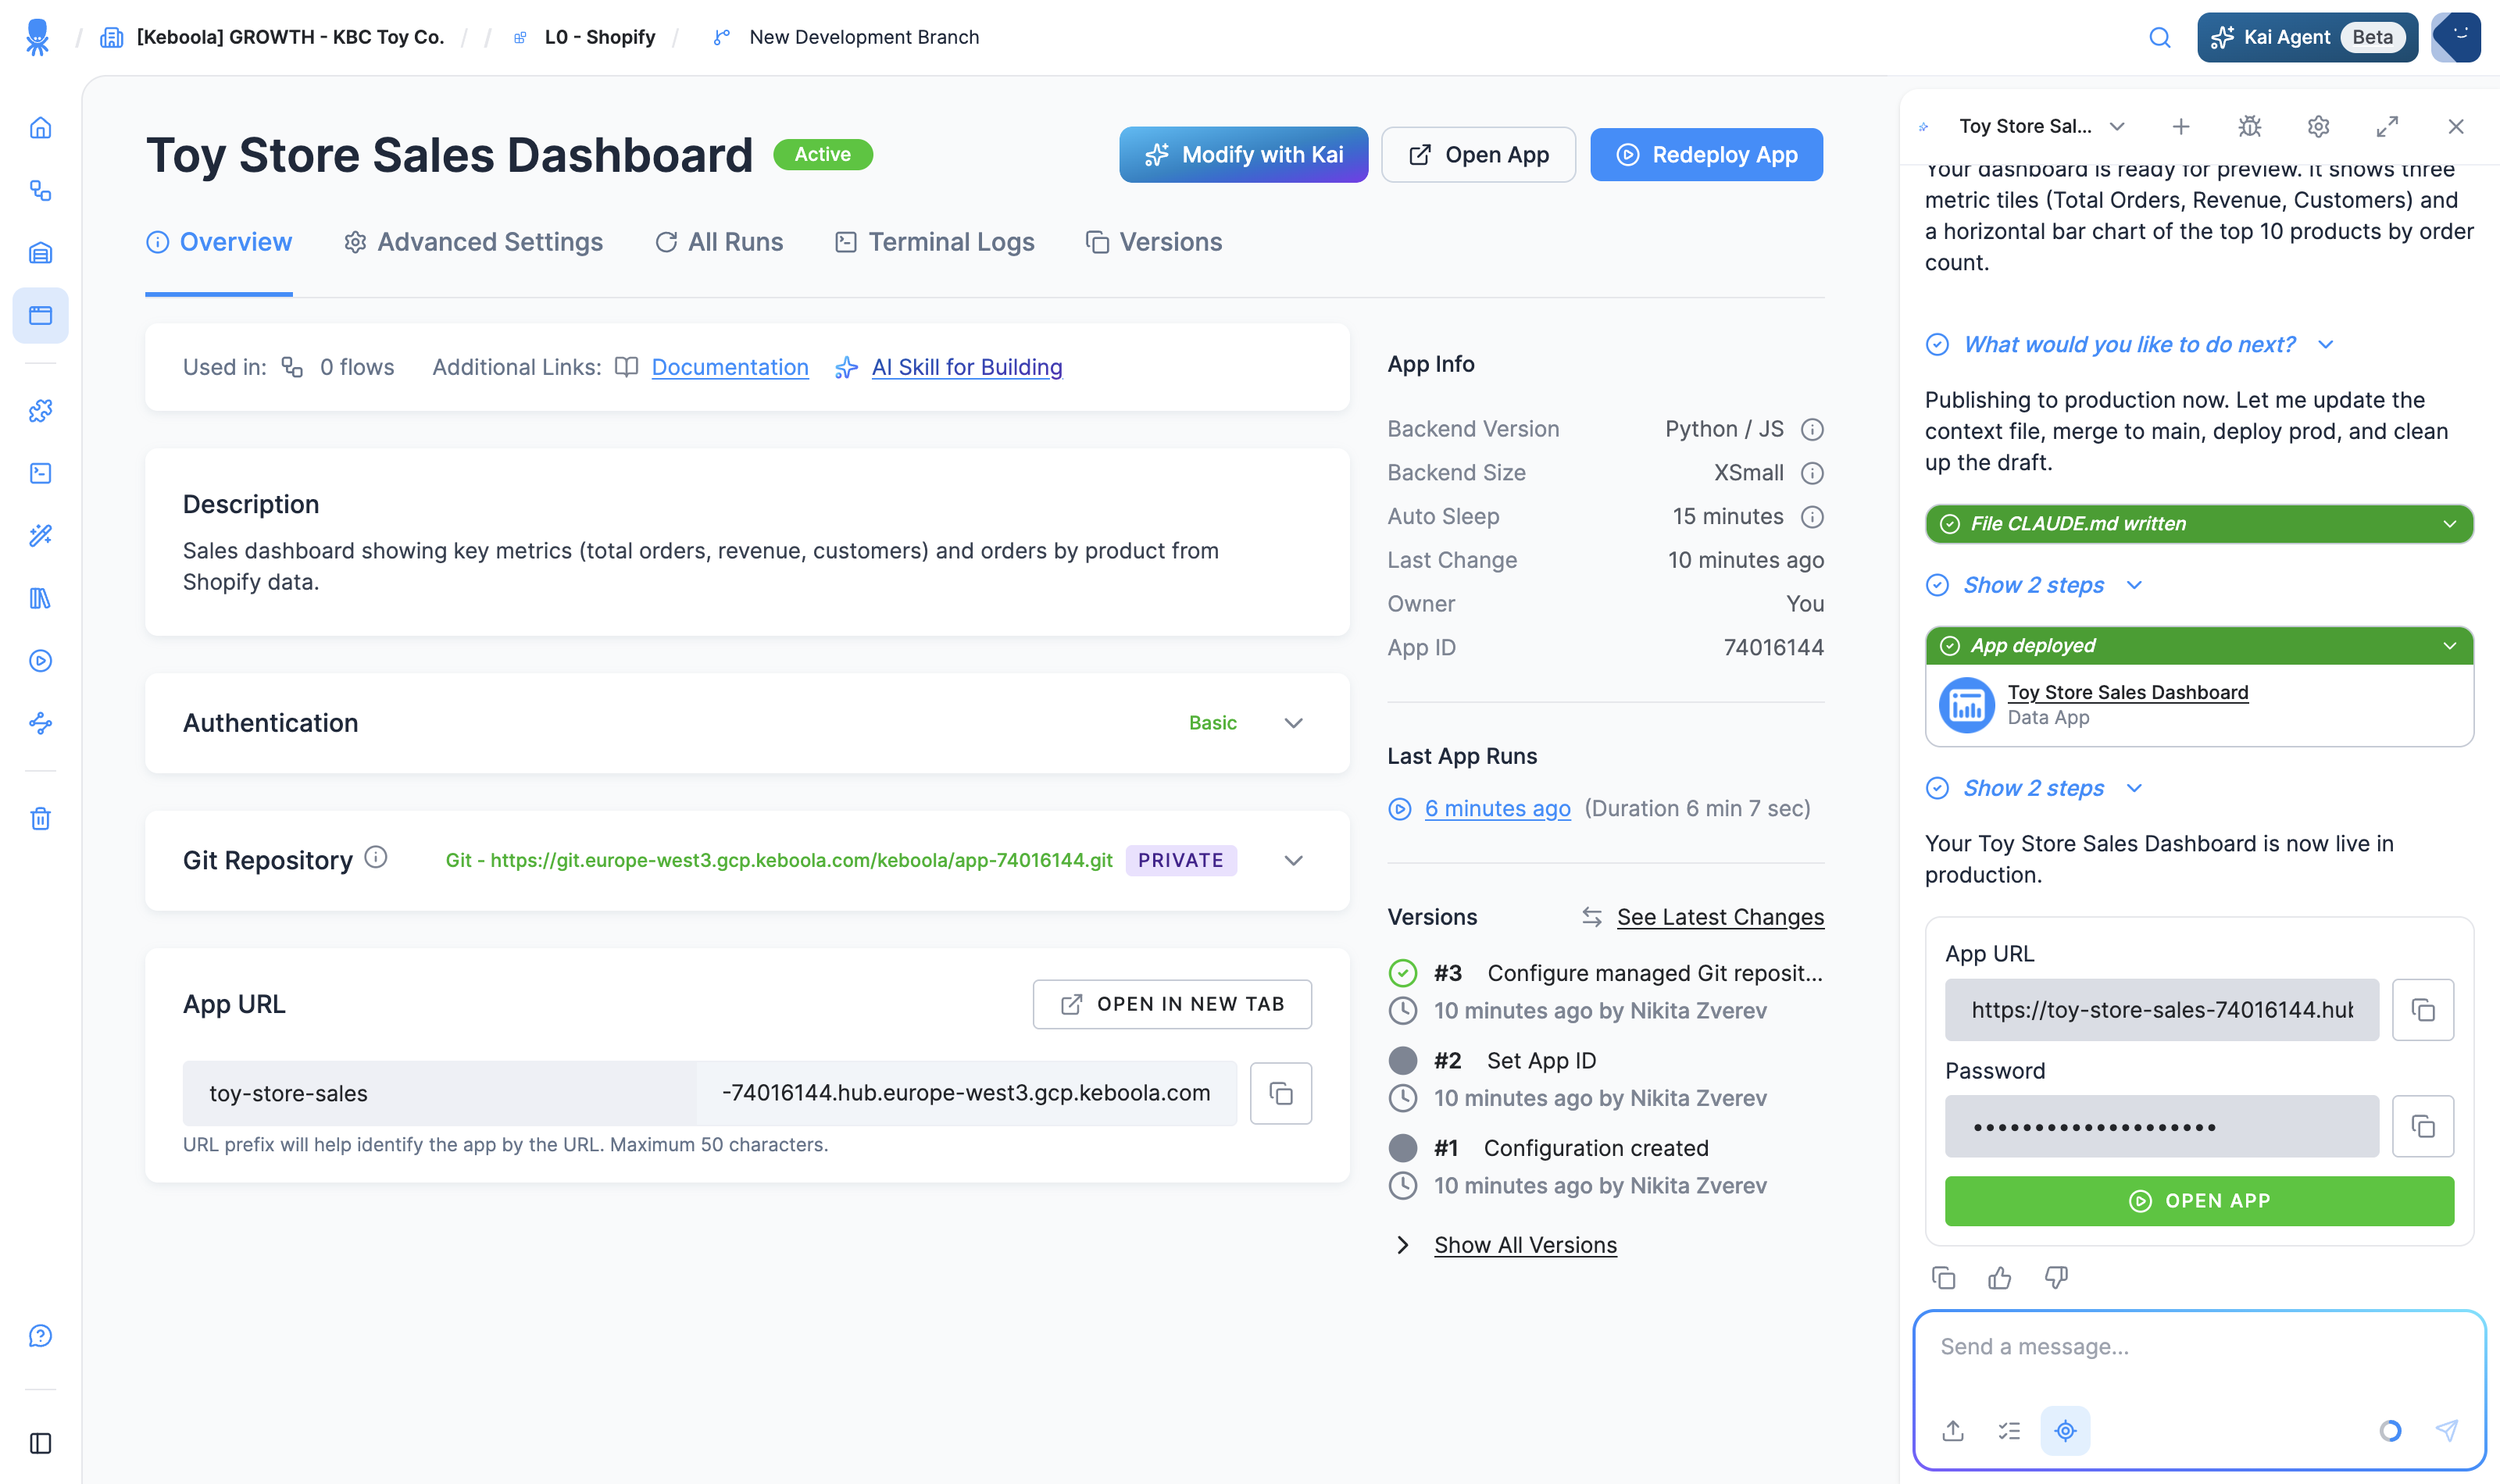
By default the app is protected with Basic (Password) authentication — the generated password also sits on the app’s configuration page, ready to copy. To change who can access it (public, a password, SSO, GitHub, and more), see Authentication.
Open the URL, enter the password, and your app is live — running on your governed data, served from its own address.
That’s it — you’ve built and published your first app. You described what you wanted, Kai read your governed data, planned, and deployed it — and you never picked a framework. The same loop builds dashboards, internal tools, data narratives, and more; for the concepts behind it, see What are Keboola apps.
What’s next
Section titled “What’s next”- Control who can open it → Authentication
- Share it with your team → Publish and share
- Prefer to click through it yourself? → Create an app manually
- Want full control over the code? → Build locally
- See more of what people build → Beyond dashboards
- The concepts behind it → What are Keboola apps